Whether you work from home, have to schlep into an office, or both, chances are you spend a fair bit of time on video calls. For any job where you work with colleagues, clients, or contractors, video calls are par for the course now—and that’s before you get into video meetings you might have in
Whether you work from home, have to schlep into an office, or both, chances are you spend a fair bit of time on video calls. For any job where you work with colleagues, clients, or contractors, video calls are par for the course now—and that’s before you get into video meetings you might have in your spare time, for book clubs or family reunions.
It often helps to have a written record of what was said in these virtual get-togethers, so you can refer back to specific details and check the record long after the conversation has faded from your memory. And, thanks in part to advances in AI, there are now a ton of apps around that can recognize human speech, turn it into digital text, and present you with a transcription—almost in real time, in some cases.
Just about every video meeting app out there has its own transcription tool included, so this is one option. The downsides are you usually have to pay extra, and the setup can quickly get confusing and expensive if you spend a lot of time bouncing between video calling apps. This works best if you spend all your time with one specific platform.
For Zoom, you’re going to need the Workplace Pro subscription ($16.99 a month) or higher to get the cloud recording feature. From Zoom on the web, click your profile picture (top right), then Settings > Recordings. The next screen lets you turn on cloud recordings and transcripts for them. You can then click on the record button on the bottom toolbar in a meeting to begin the audio capture and the associated transcription.
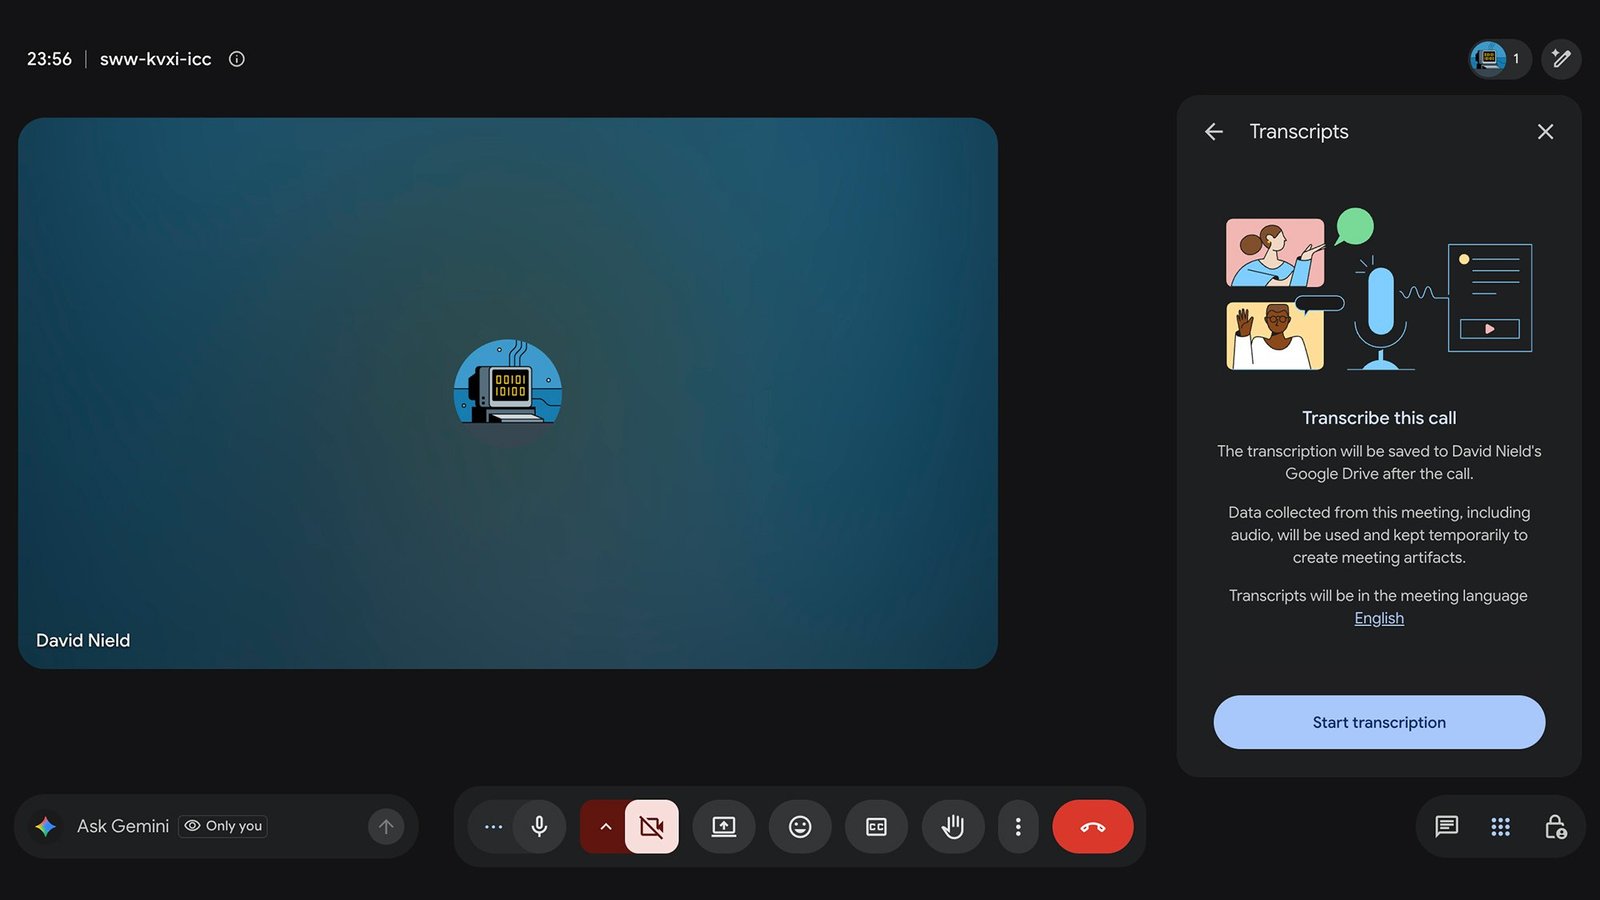
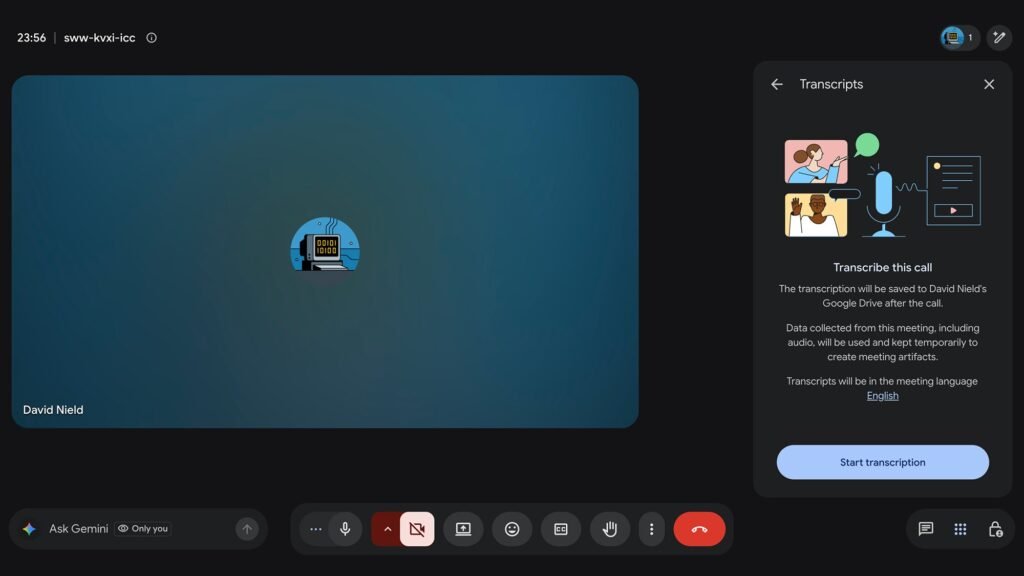
With Google Meet, you need to have at least Google Workspace Individual ($9.99 a month) to access the transcription feature. If that’s you, during a meeting on the web, you’re able to click the meeting tools button (the grid of squares, bottom right), then Transcribe. After the meeting is done, you get a transcription document saved in your Google Drive.
Then there’s Microsoft Teams. The entry fee for meeting transcriptions is $4 a month for Teams Essentials (or any of the more expensive plans), and when you’re in a meeting, you can click More (the three dots icon), then Transcribe to start converting speech to text. Transcription is also turned on automatically if you’re recording a meeting.
Transcribe as you go
Another approach to this is to use an app that sits in the background on your computer, grabbing the audio from the meeting and converting it in real time. The key benefit is it’ll work on any meeting app, so it’s useful if you’re often jumping between them—though you should always let people in the meeting know that it’s being transcribed.
Scribbl is one of the best options here: It works across Google Meet, Microsoft Teams, and Zoom, and you don’t need to add a bot to your meetings, because they’re automatically detected when they start. Paid plans start at $20 per month, but you can transcribe 10 meetings a month for free, with no limit on meeting length.
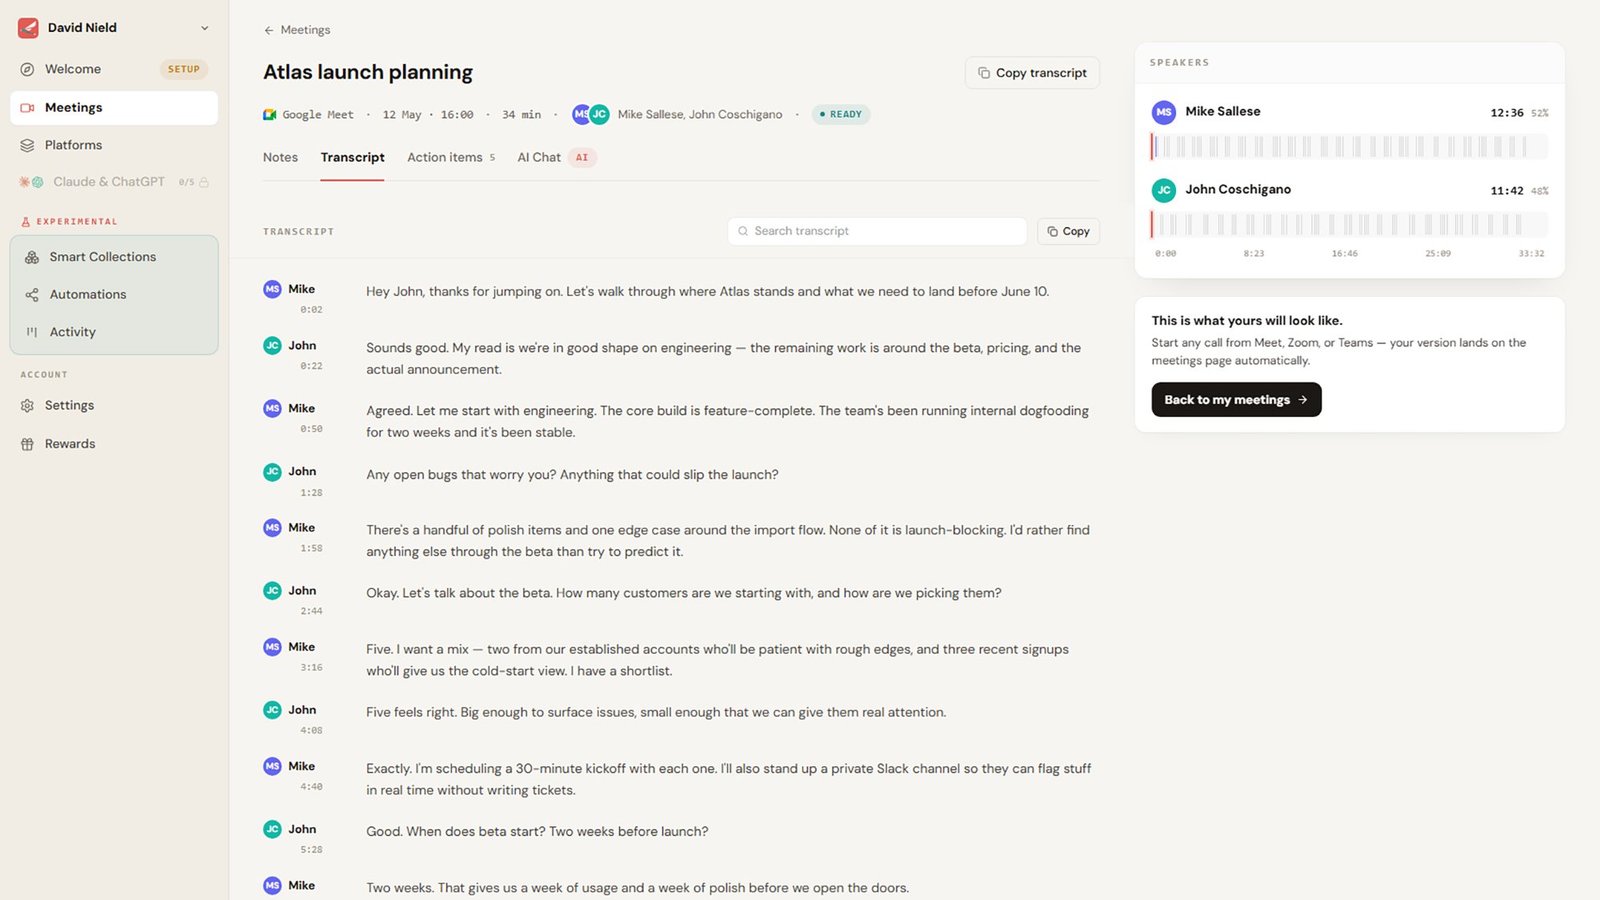
To use Scribbl, you don’t need to do much except give it the necessary permissions and then leave the app open, and it’ll begin transcribing when it needs to. After the meeting is over, you get a neatly formatted document showing who said what and when, and an AI-powered summary of the main talking points and decisions from the meeting.
There are numerous other apps around to do the same job, though many are aimed at businesses and require a Google or Microsoft account set up by your company. Otter.ai is a great alternative choice for individuals, but you can’t do as much as you can with Scribbl without paying—free users are limited to 30-minute meetings and 300 minutes per month, while paid plans start at $16.99 a month.
Convert audio recordings
There’s one more option here, which is to record meeting audio through Windows or macOS, then get an app to transcribe the recording—there are more programs out there that can transcribe a file rather than a live meeting, so while it’s not quite as convenient, you’ve got more choice (and may not have to pay as much).
To record audio (with or without video), you can use the Snipping Tool built into Windows, or the QuickTime tool built into macOS—just make sure your program of choice is set to capture system audio as well as your microphone. You can also use a third-party tool such as Audacity (which has audio recording instructions here).
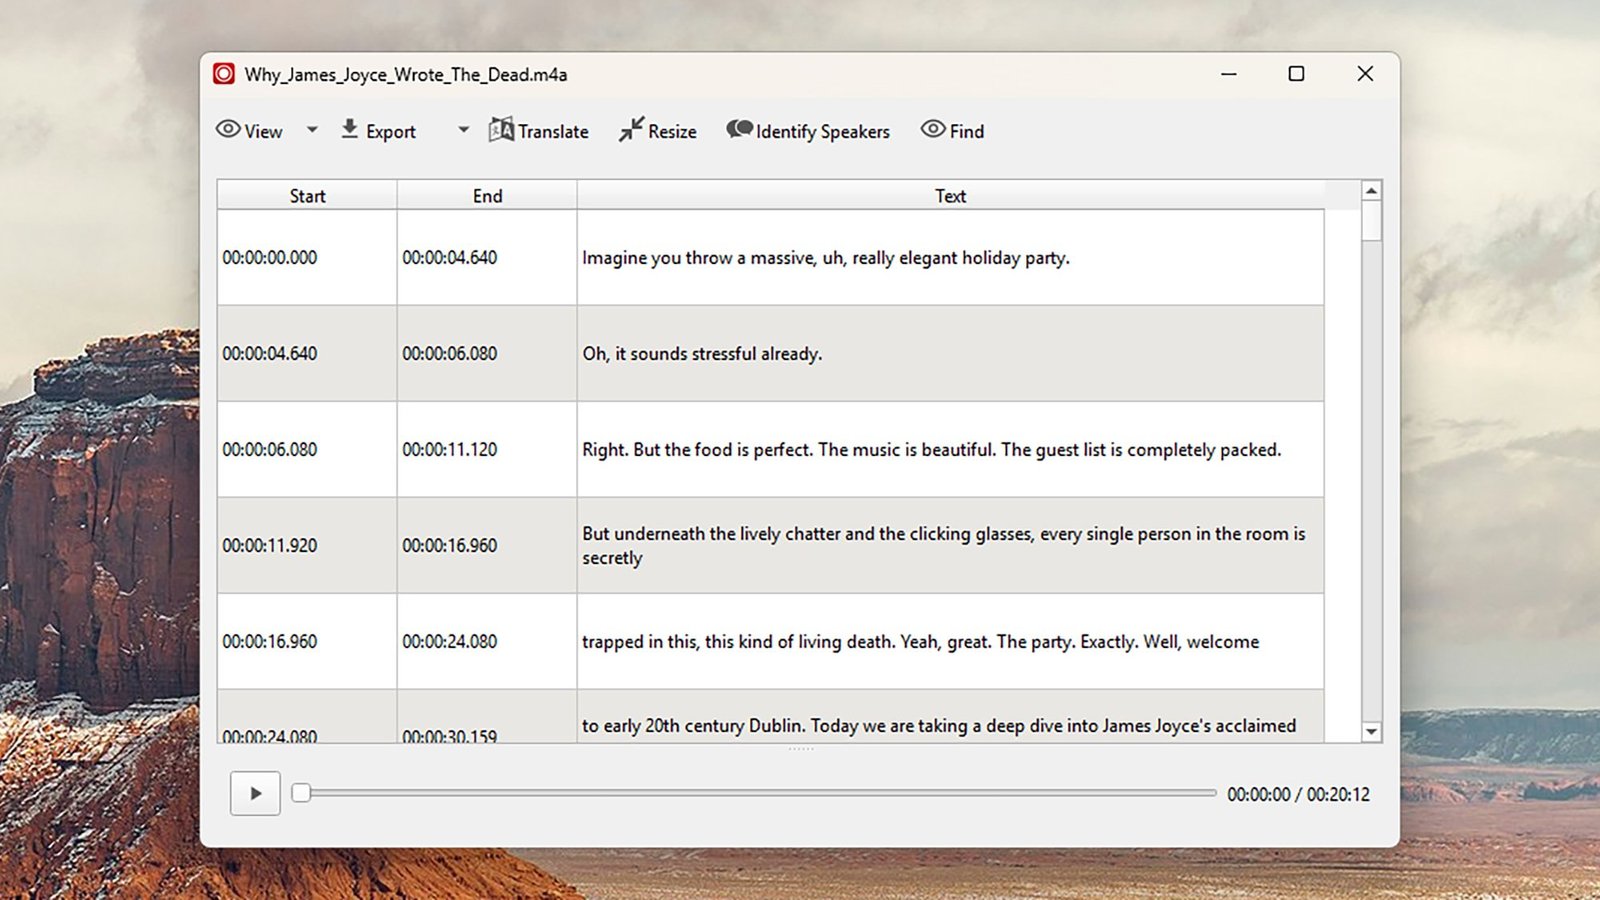
With your audio ready to go, you can pick a program to transcribe it. Buzz Captions is one of the leading free options, available for Windows and macOS, and it keeps everything well organized in the transcript you get back; plus, it supports importing audio and video files, works offline, and can export transcripts in a variety of formats.
You’ve got alternatives too. Spokenly will do the job on Windows or macOS, and supports dictation and audio file conversion—all the basics are free, with better models and more AI features available on paid plans starting at $12 a month. MacWhisper, meanwhile, is a capable macOS option that is elegant and easy to use, and all the core features are free of charge. A Pro version, for $72.55, adds a bunch of extra integrations and features (including podcast transcription).

2026 Popular Science Home of the Future Awards
Keep following us for the latest insights.