
Razer has been slowly refining its range over the years. They’ve moved beyond the “gamer-only” era and are firmly planting their feet in the space of serious business creators and presenters. Their latest release, the Razer Seiren V3 Pro, is a perfect example of this evolution. This is not just another incremental update; It is
Razer has been slowly refining its range over the years. They’ve moved beyond the “gamer-only” era and are firmly planting their feet in the space of serious business creators and presenters. Their latest release, the Razer Seiren V3 Pro, is a perfect example of this evolution.
This is not just another incremental update; It is a professional-grade dynamic microphone designed to bridge the gap between simple plug-and-play USB setups and high-end studio XLR gear. I’ve been putting it through its paces in my own studio, and it’s safe to say that Razer has delivered something incredibly versatile.
A beautiful and functional design.
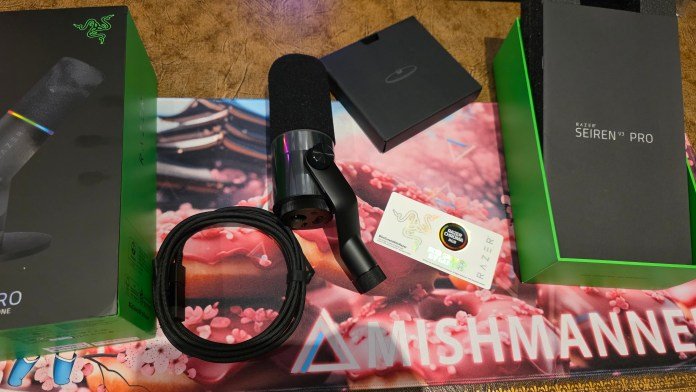
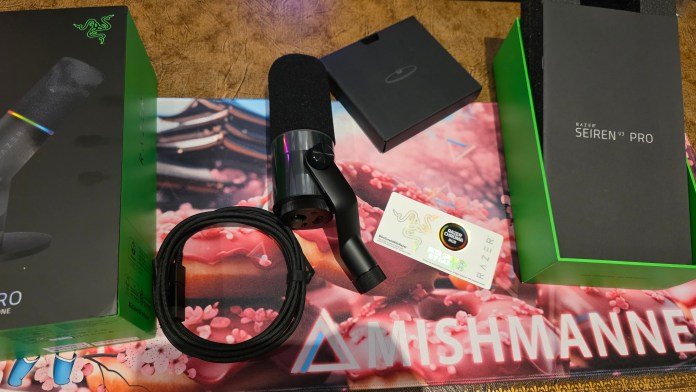
Right out of the box, the first thing that catches your attention about the Razer Seiren V3 Pro is its weight. It features a premium zinc unibody construction that feels incredibly solid. If you’ve ever used cheaper microphones on a desktop boom, you know the struggle: if the microphone is too light, the arm just pops up again. The Razer Seiren V3 Pro is the perfect weight to hold a premium microphone arm perfectly in place.
The microphone comes with a sturdy desktop base with a rubber grip to prevent it from sliding around the desk, but the integrated stand also uses a standard thread, making it easy to transition to a boom arm. The included mini adjustable arm stand is great for dialing in the exact angle you need. I knew what I was going to do right away. I put the stand back in the box and mounted the microphone on the arm I already had on my desk.
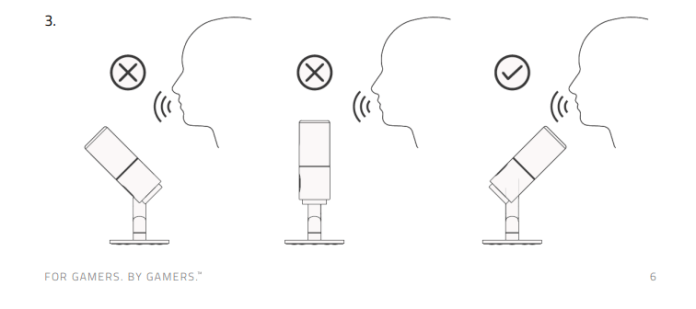
Pro Tip: Remember that this is a dynamic microphone with a cardioid pattern, meaning sound is captured from the end of the microphone, not the sides. You should point the top of the microphone directly at your mouth. If you’re unsure, Razer includes a booklet with great visual diagrams to make setup foolproof.
Subtle Features That Really Work
Visually, Razer has struck a great balance between elegant professionalism and its signature style. The branding is subtle and the overall silhouette is incredibly clean. It features an integrated cover that acts as a built-in shock absorber and pop filter, completely eliminating the need for an ugly foam sock. If you prefer an even slimmer, hyper-minimalist look, you can easily remove the outer filter cover.
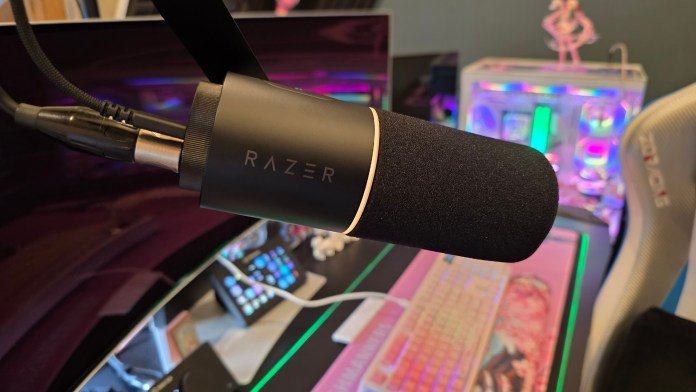
And yes, it features Razer Chroma RGB and is made with absolute class. Instead of blinding multicolored stripes, it’s a subtle and functional ring of light at the base. I love that the ring acts as a real-time visual indicator. It changes to a purple color based on your gain levels so you always know exactly where your audio is. The lighting turns red when muted, providing a clear picture of when you are “on” or not.
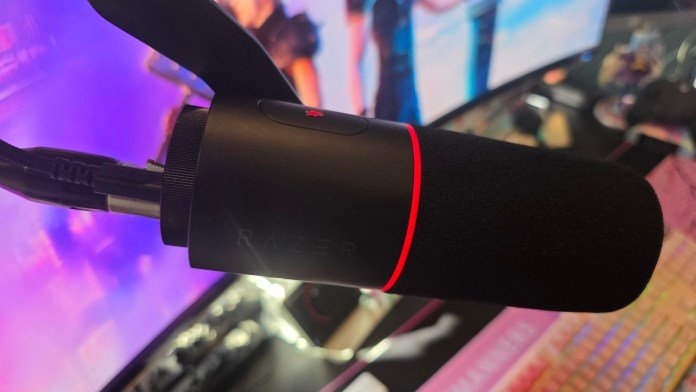
Smart touch controls
Razer has nailed physical usability here. On the top of the Razer Seiren V3 Pro, you’ll find a tap-to-mute sensor. Notice I said touch, not press. No need to press a clunky physical button that sends a massive “thud” along the audio line; A simple, light touch instantly turns it on or off mid-call or mid-stream.
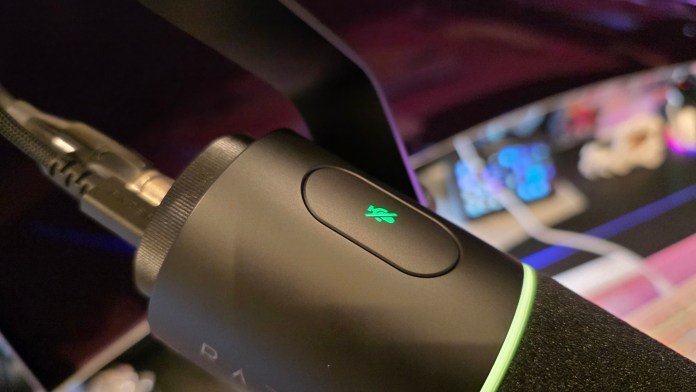
At the bottom, there’s a dedicated physical gain dial, along with a headphone jack for direct monitoring with zero latency. While it can be a little tricky to access the dial once the microphone is deeply inserted into a boom setup, it’s still designed to be a “set it and forget it” feature.
Versatility: the magic of double USB-C and XLR
The main feature of the Razer Seiren V3 Pro is its true hybrid connectivity. It has a USB-C port and a full XLR connection. This means that the microphone can be adapted to your needs. If you’re just getting started, you can use the included USB cable (which conveniently comes with a USB-A to USB-C adapter) to instantly plug and play on a PC or Mac.
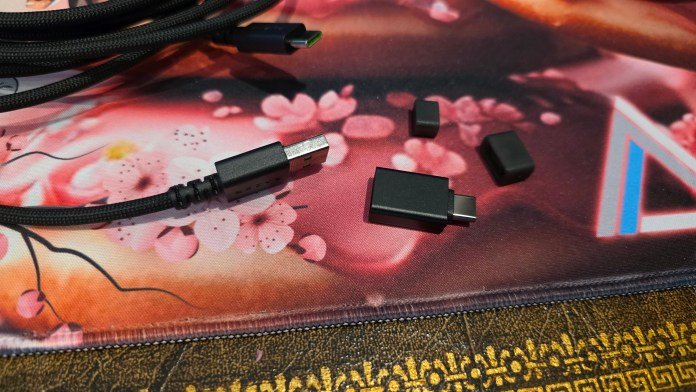
However, if you want the best results, the XLR connection is where this microphone really shines.
I connected the Razer Seiren V3 Pro to my existing XLR mixer using my own XLR cable (note: Razer doesn’t include an XLR cable in the box, so you’ll need to grab one separately). Even when using XLR, you’ll want to use the USB cable for two things:
- Using Razer Synapse; More on this below.
- Using RGB lighting
The reason it needs USB power is because the incredible digital signal processing (DSP) that comes with this microphone and the RGB lighting require digital power. The USB cable controls the built-in smart audio processing and lights. While you can run audio through your XLR cable, you’ll miss out on some key digital features. So I opted to have both cables connected. Fortunately, my boom arm has a built-in cable slot, so running both lines wasn’t a problem, but you’ll want to make sure you have two free USB slots on your PC: one for the Razer Seiren V3 Pro and one for your mixer (because the mixer connects the XLR sound to your computer).
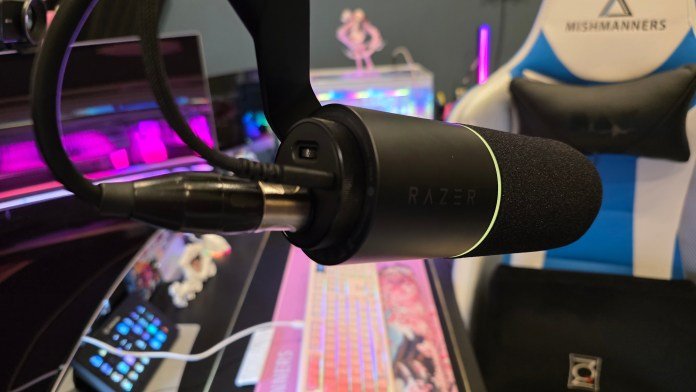
When you run a hybrid setup like this, you have to decide your workflow philosophy: do you maximize the mic gain and control everything through your hardware mixer, or vice versa? Personally, I prefer to keep mic levels high and gain balanced, managing final output, mutes and adjustments directly on my physical mixer. The flexibility to choose how to manage your workflow is fantastic.
Clear, crisp, studio-quality sound
So what does it really sound like? In a word: incredible.
The Razer Seiren V3 Pro includes a large 30mm dynamic capsule that delivers a rich, warm drive tone. On my first voice call using the new XLR setup, people immediately commented on how crisp and clear I sounded. I also used it to record voiceovers and audio for some upcoming videos, and the jump in quality from my previous setup was night and day. It does an excellent job of isolating your voice and rejecting background noise. Additionally, the amount of audio adjustments I had to make in post-production was significantly less, resulting in a more natural-sounding voice with less work.
You can also unlock some high-end features through Razer Synapse. Once you plug in the microphone and open Razer Synapse, the software should detect the new hardware, install the updates, and you’re done.
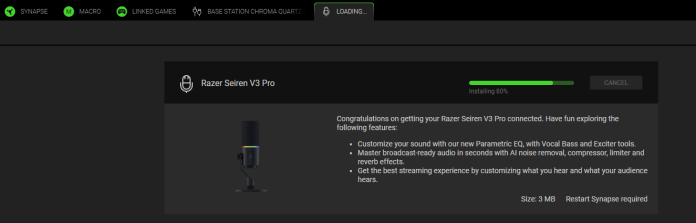
There are some great features you can play with within Synapse, including:
- Multi-level sound customization through floating 32-bit support – this is the same format used in professional recording studios. It captures huge dynamic range, meaning that even if you scream during an intense gaming moment, the audio won’t clip or distort, saving you a lot of time in post-production.
- Using AI noise reduction, compressor and other fun effects via built-in audio DSP: The microphone has an internal DSP chip that handles compression, limiting, an expander and an AI noise remover right in the hardware, meaning your PC doesn’t have to do any heavy lifting.
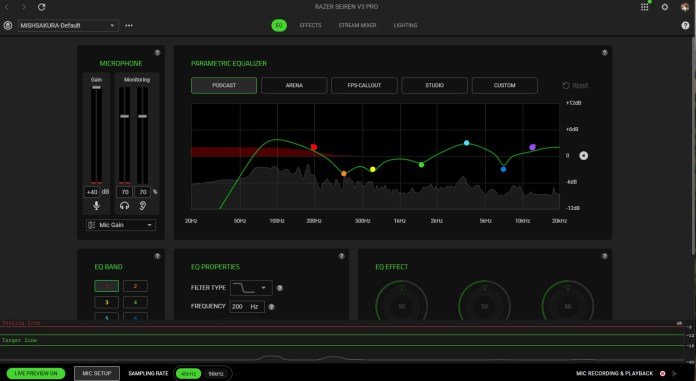
You can also change microphone lighting effects within Synapse.
Final thoughts
The Razer Seiren V3 Pro is a home run. I think the fact that we completely switched everything to this new microphone says a lot about the capability of the microphone. By offering simultaneous USB and XLR capabilities, Razer has created a microphone that fits a beginner streamer today, but won’t need to be replaced when you upgrade to a professional studio mixer tomorrow. It is also suitable for professionals who record videos, present in webinars or give live talks.
The microphone looks beautiful, feels incredibly robust, and most importantly, delivers pristine, streaming-ready audio. If you’re looking to seriously up your audio game, the Razer Seiren V3 Pro is worth investing in, and at AU$429.95 it’s certainly an investment. But those dollars will still get you the beautiful Razer Chroma stickers right out of the box. Naturally, that was the first thing I pulled out!
Keep following us for the latest insights.