Though invisible itself, the air we breathe is a microcosm of identifiable pollen, fungal spores, viruses, dust particles, and fine particles of human pollution from everything from cars to asphalt sidewalks. It’s not something we should obsess over day to day, but as more people measure air quality on their own, many are getting readings they’d prefer to
Though invisible itself, the air we breathe is a microcosm of identifiable pollen, fungal spores, viruses, dust particles, and fine particles of human pollution from everything from cars to asphalt sidewalks. It’s not something we should obsess over day to day, but as more people measure air quality on their own, many are getting readings they’d prefer to address. However, not everyone wants to buy an air purifier, which can cost several hundred dollars.
One proposed solution for at-home air filtration is to use readily available materials like cardboard, box fans, square HVAC filters, and everyone’s favorite building material: duct tape. I did a version of this myself for PopSci, and, though I have mixed feelings about the process, I’m overall satisfied with the result. Here, we’ll go through what I built, how I built it, and my overall conclusions after using it, along with resources for anyone interested in reading further.
Introducing the DIY air filter cube
There are several configurations for making your own air purifier at home. One of the most documented is a Corsi-Rosenthal box, or CR box for short. It’s essentially an air filter cube, which is what I’ll be calling mine, with four sides made of furnace filters and one side made of a standard box fan (seen above). The fan pulls air through the filters and pushes out cleaner air than came in.
| Pros | Cons |
| Works effectively | More expensive than expected |
| Easy to make in about an hour | Can be noisy |
| Great for science fair projects and education | Likely impractical for most homes |
| Feels like Minecraft crafting IRL | Takes up a lot of space |
| Needs to be rebuilt when filters need replacing |
Resources and info
The United States Environmental Protection Agency (EPA) provides a lot of information about DIY air cleaners, including visual construction guides, tips on improving DIY air cleaners, and general air cleaner usage advice. EPA research on DIY air cleaners for wildfire smoke will also inevitably interest those in wildfire-prone areas who don’t want to purchase an air purifier for smoke.
These resources were used extensively throughout this project. Instead of using this guide as a total replacement for these resources, use this page as a waypoint for how an individual or student group might use one of these devices, with practical concerns highlighted along the way.
Materials and considerations
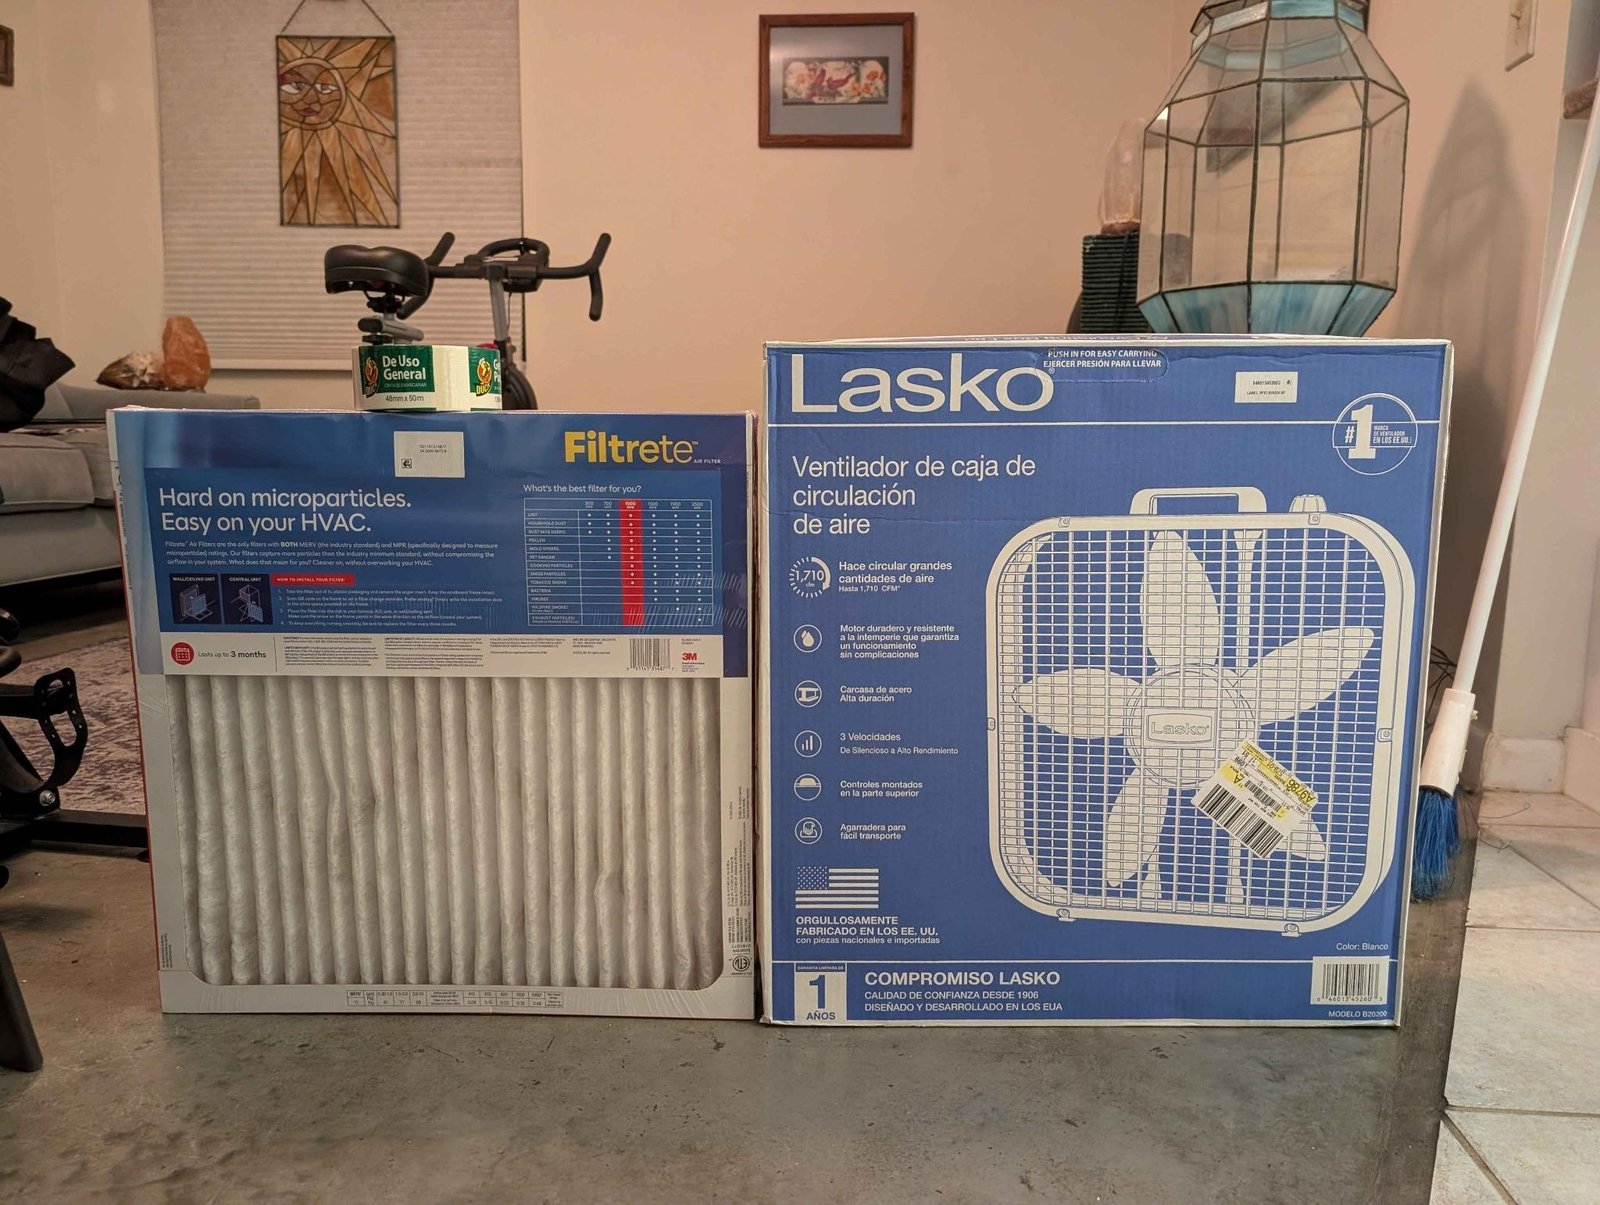
For this project you’ll need:
- 4 x 20-inch furnace air filters (MERV13 preferred)
- 1 x 20-inch box fan with a modern ETL or UL listing
- Cardboard box the fan came in
- A thick roll of duct or masking tape (1.88-inch works nicely)
- A cutting instrument.
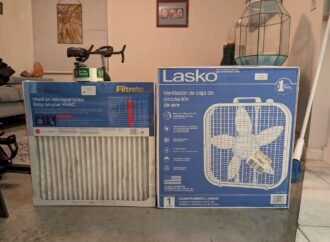
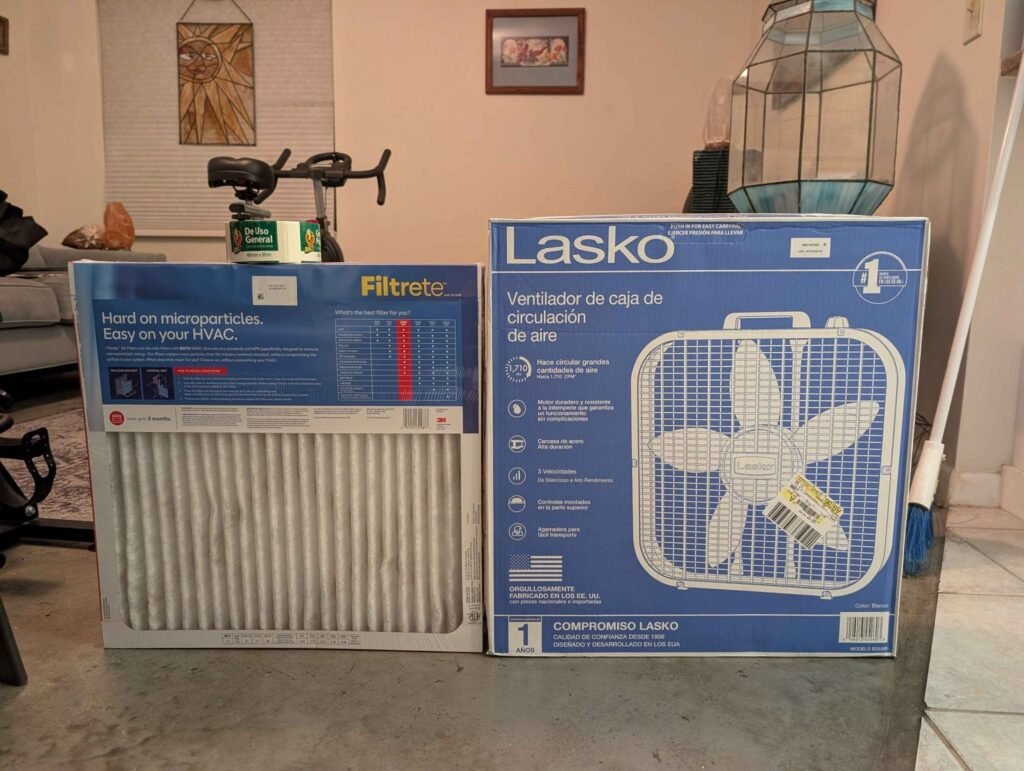
I went to my local Walmart and bought a Lasko box fan, two pairs of Filtrete 20-inch MERV 11 furnace filters, and a roll of Duck Brand General Purpose Masking Tape. This represents what a typical consumer might buy without specialty ordering options or bulk purchasing. The total came to $73.58 before taxes and $78.36 after Florida state sales tax.
Notes on choosing the box fan
The box fan, or any fan in a roughly square housing, should be a modern ETL- or UL-listed fan (clearly marked on the box) because older fans and those not ETL- or UL-listed may have issues when run facing upward. This is a safety issue and should not be skipped.
Since the cardboard box your fan comes in will likely become part of your air filter cube, it’s worth getting one that isn’t damaged, though you can tape over small tears.
Note on choosing filters
EPA guidance recommends MERV13 or equivalent filters for the best experience. The MERV scale indicates how much and what kinds of particles the device can filter. High-tier MERV filters can be costly, so I opted for MERV11 since I was able to get a fairly good deal (around $23) per two-pack of these panels, and the notable difference between MERV11 and MERV13 was that the latter can handle forest fire smoke particles, which is not an issue in my area.
Assembling the air filter cube
You can assemble your air filter cube in less than an hour, even with one person. Rather than a strict job that requires exhaustive measuring and cutting, it’s more of an approximate job that relies on the magic of tape to do the heavy lifting. This is a feasible parent-and-child project for those 6+ and a solo project for those 10+.
Step 1: Establishing the interior
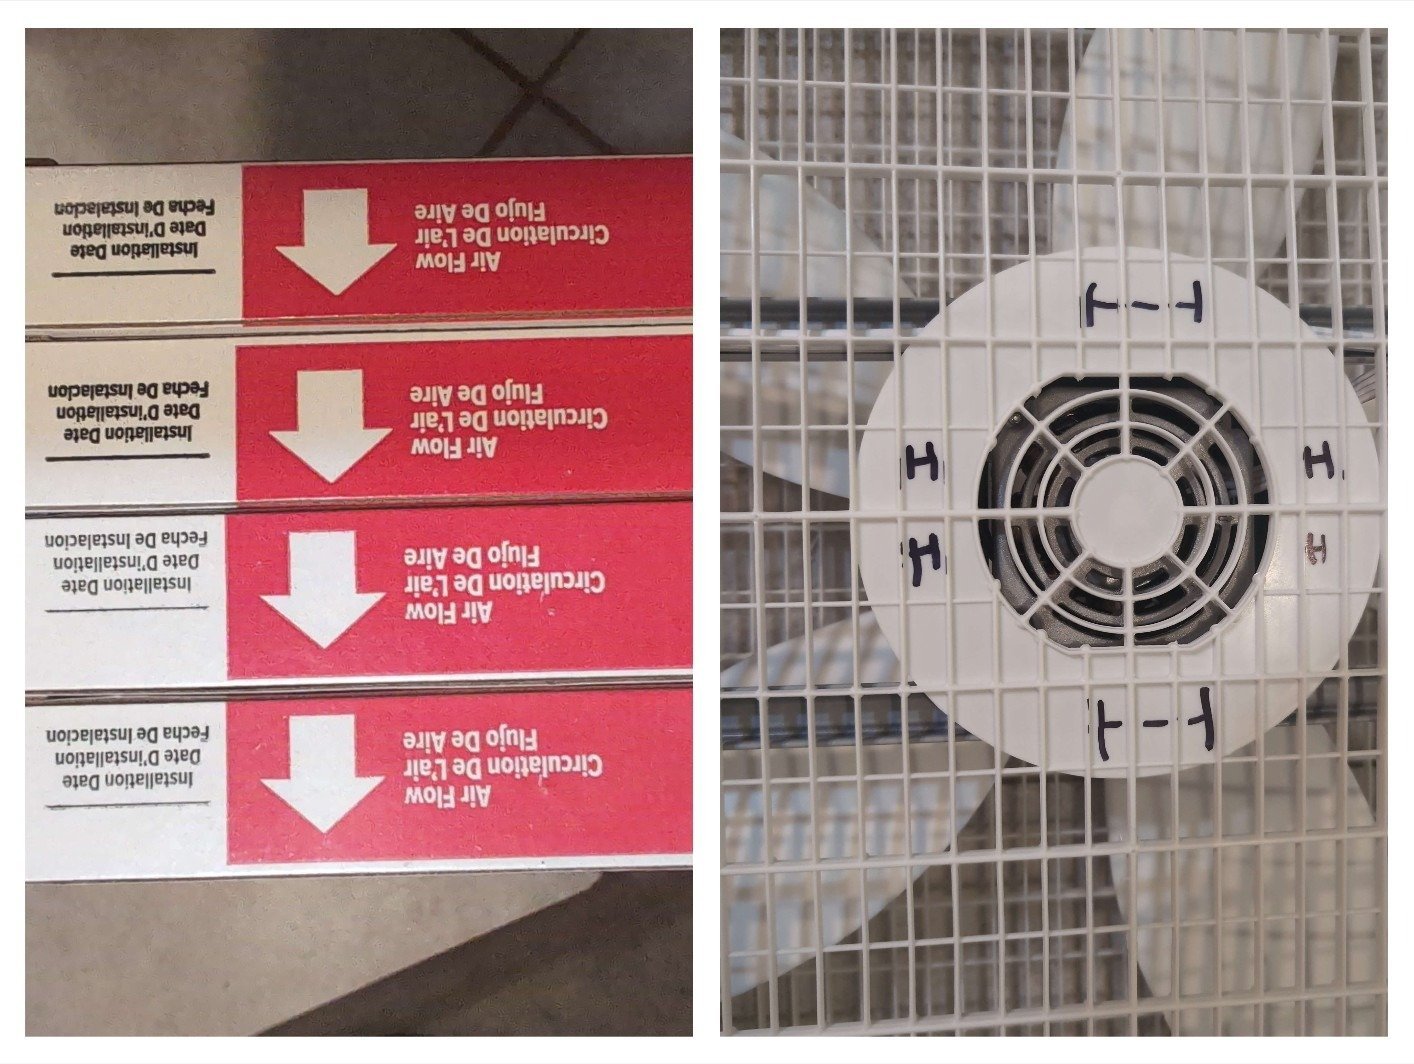
For this project, we want air to flow in through the filters and out through the fan. That means that the part of the fan that blows air out needs to be on the exterior of your cube, and the back side of the fan that pulls in air needs to be on the inside of your cube. Like a surgeon marking which limb to operate on before making the first cut, I marked the interior of my fan with ‘I’s for safety. Meanwhile, your filters should have arrows. Those arrows should point towards the inside of the cube.
Step 2: Fit the filters together
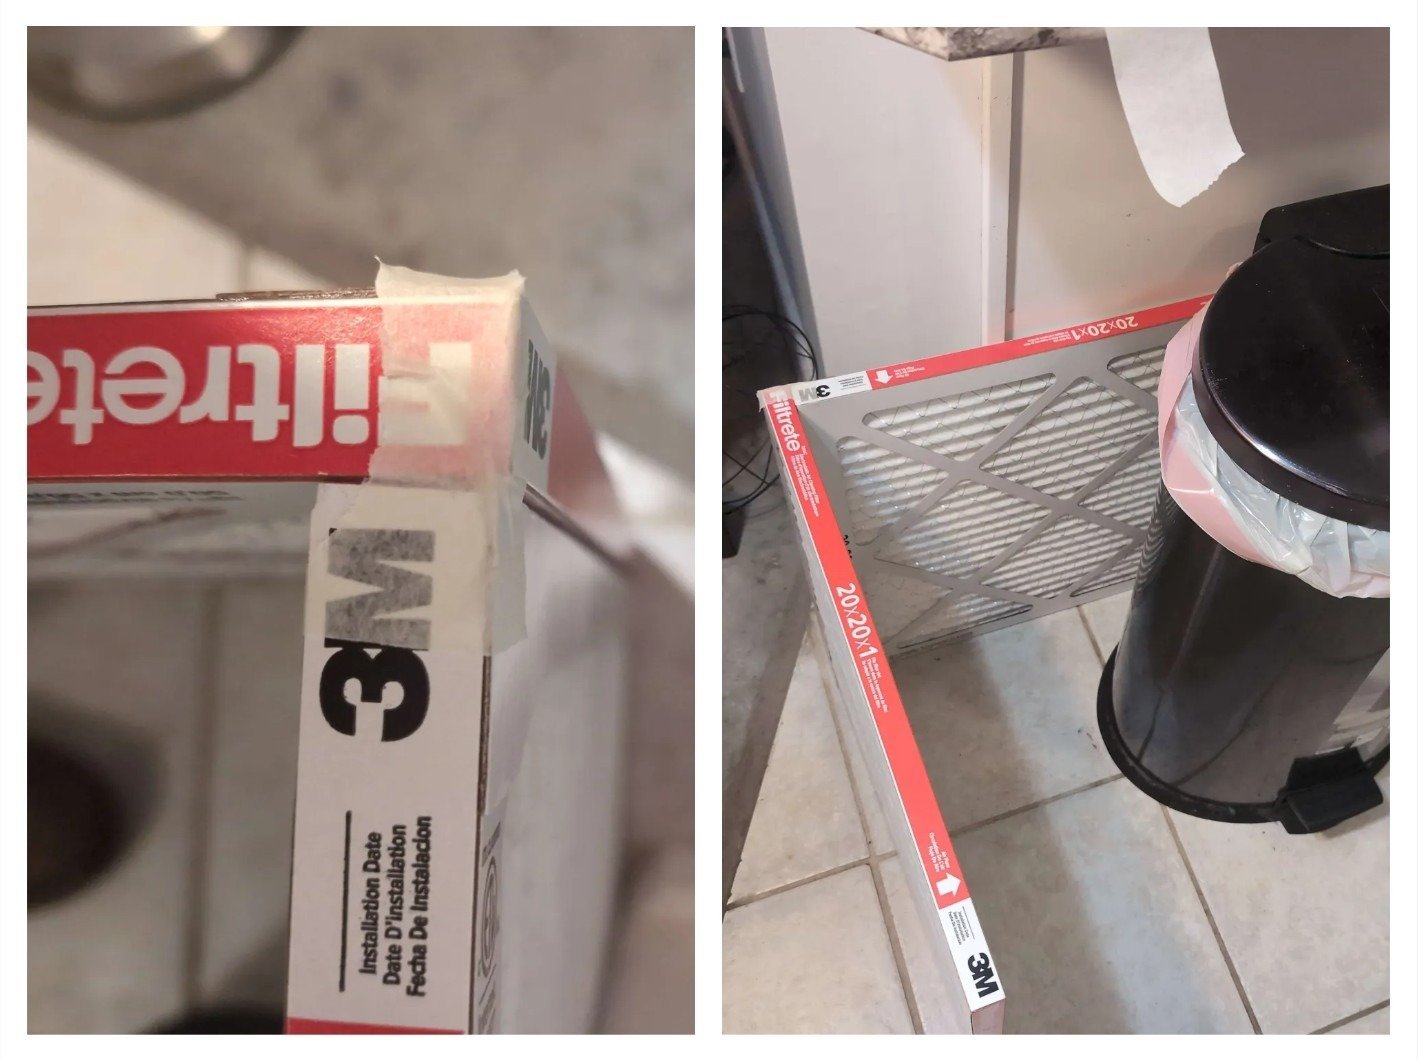
Place two filters together and use a small piece of tape to connect them as shown. Remember to have the arrows pointing inwards. Continue taping the filters until you form a square. You can either use two people here or secure one filter vertically with a trash bin to do it solo.
Step 3: Secure the edges
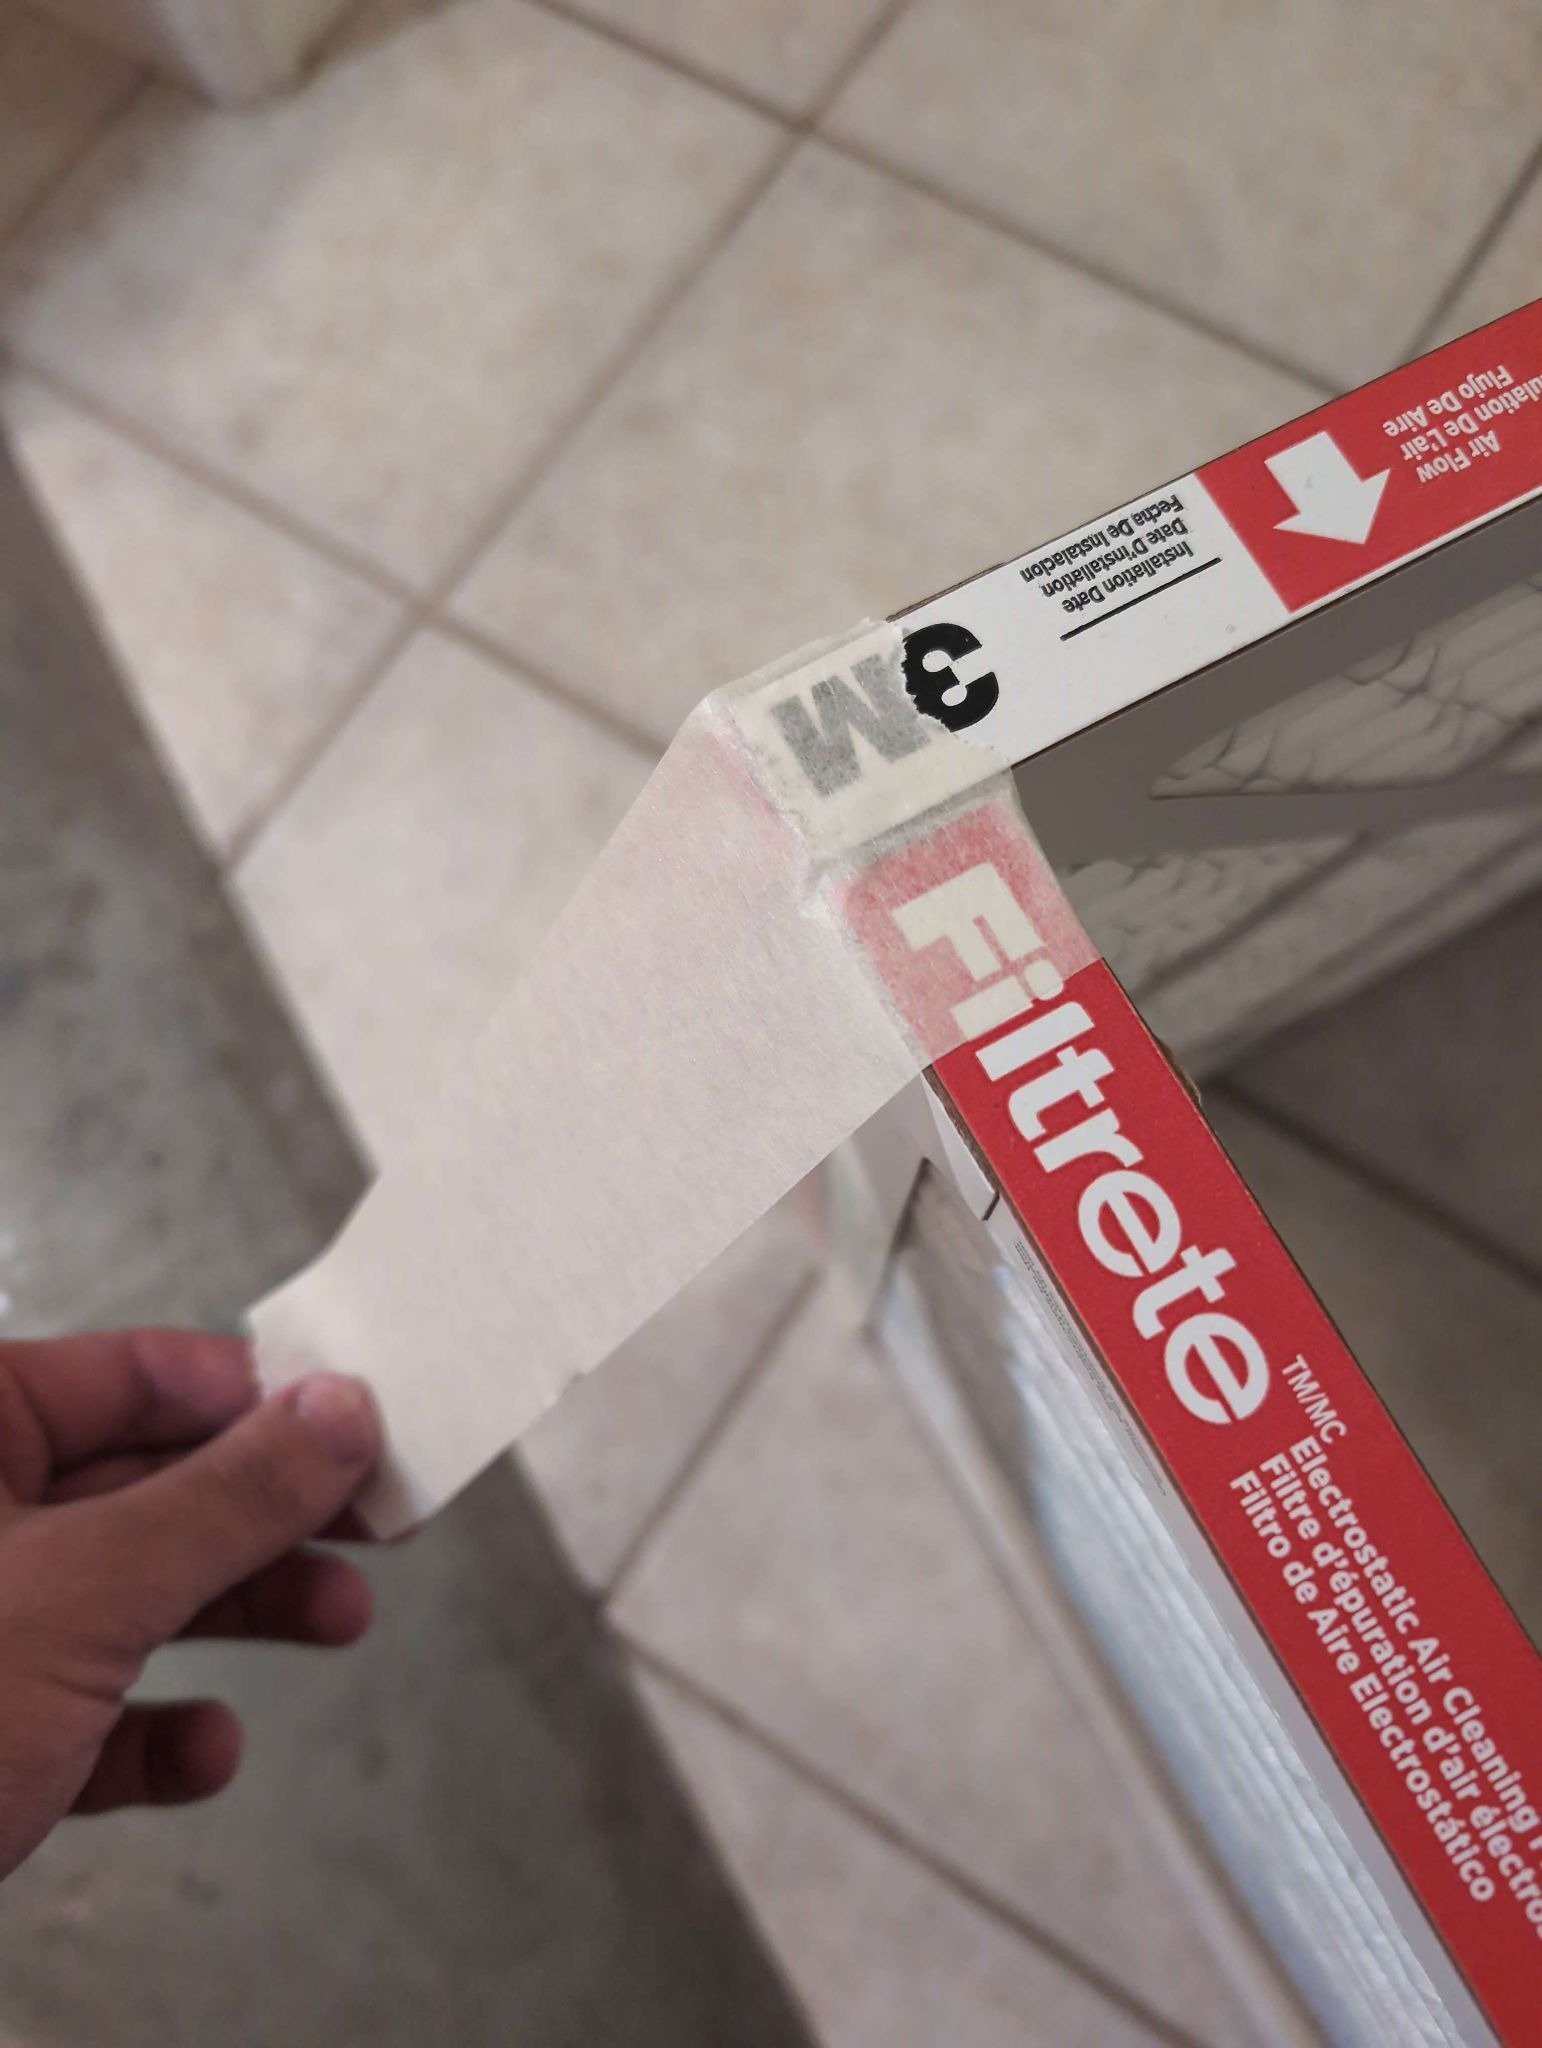
The resulting square will be flimsy and contain cracks that air can get through. Tape the seams with duct tape. Don’t worry about being imperfect on the first try. In fact, going over the seams multiple times will only make your cube more secure and airtight.
Step 4: Flip and finish securing
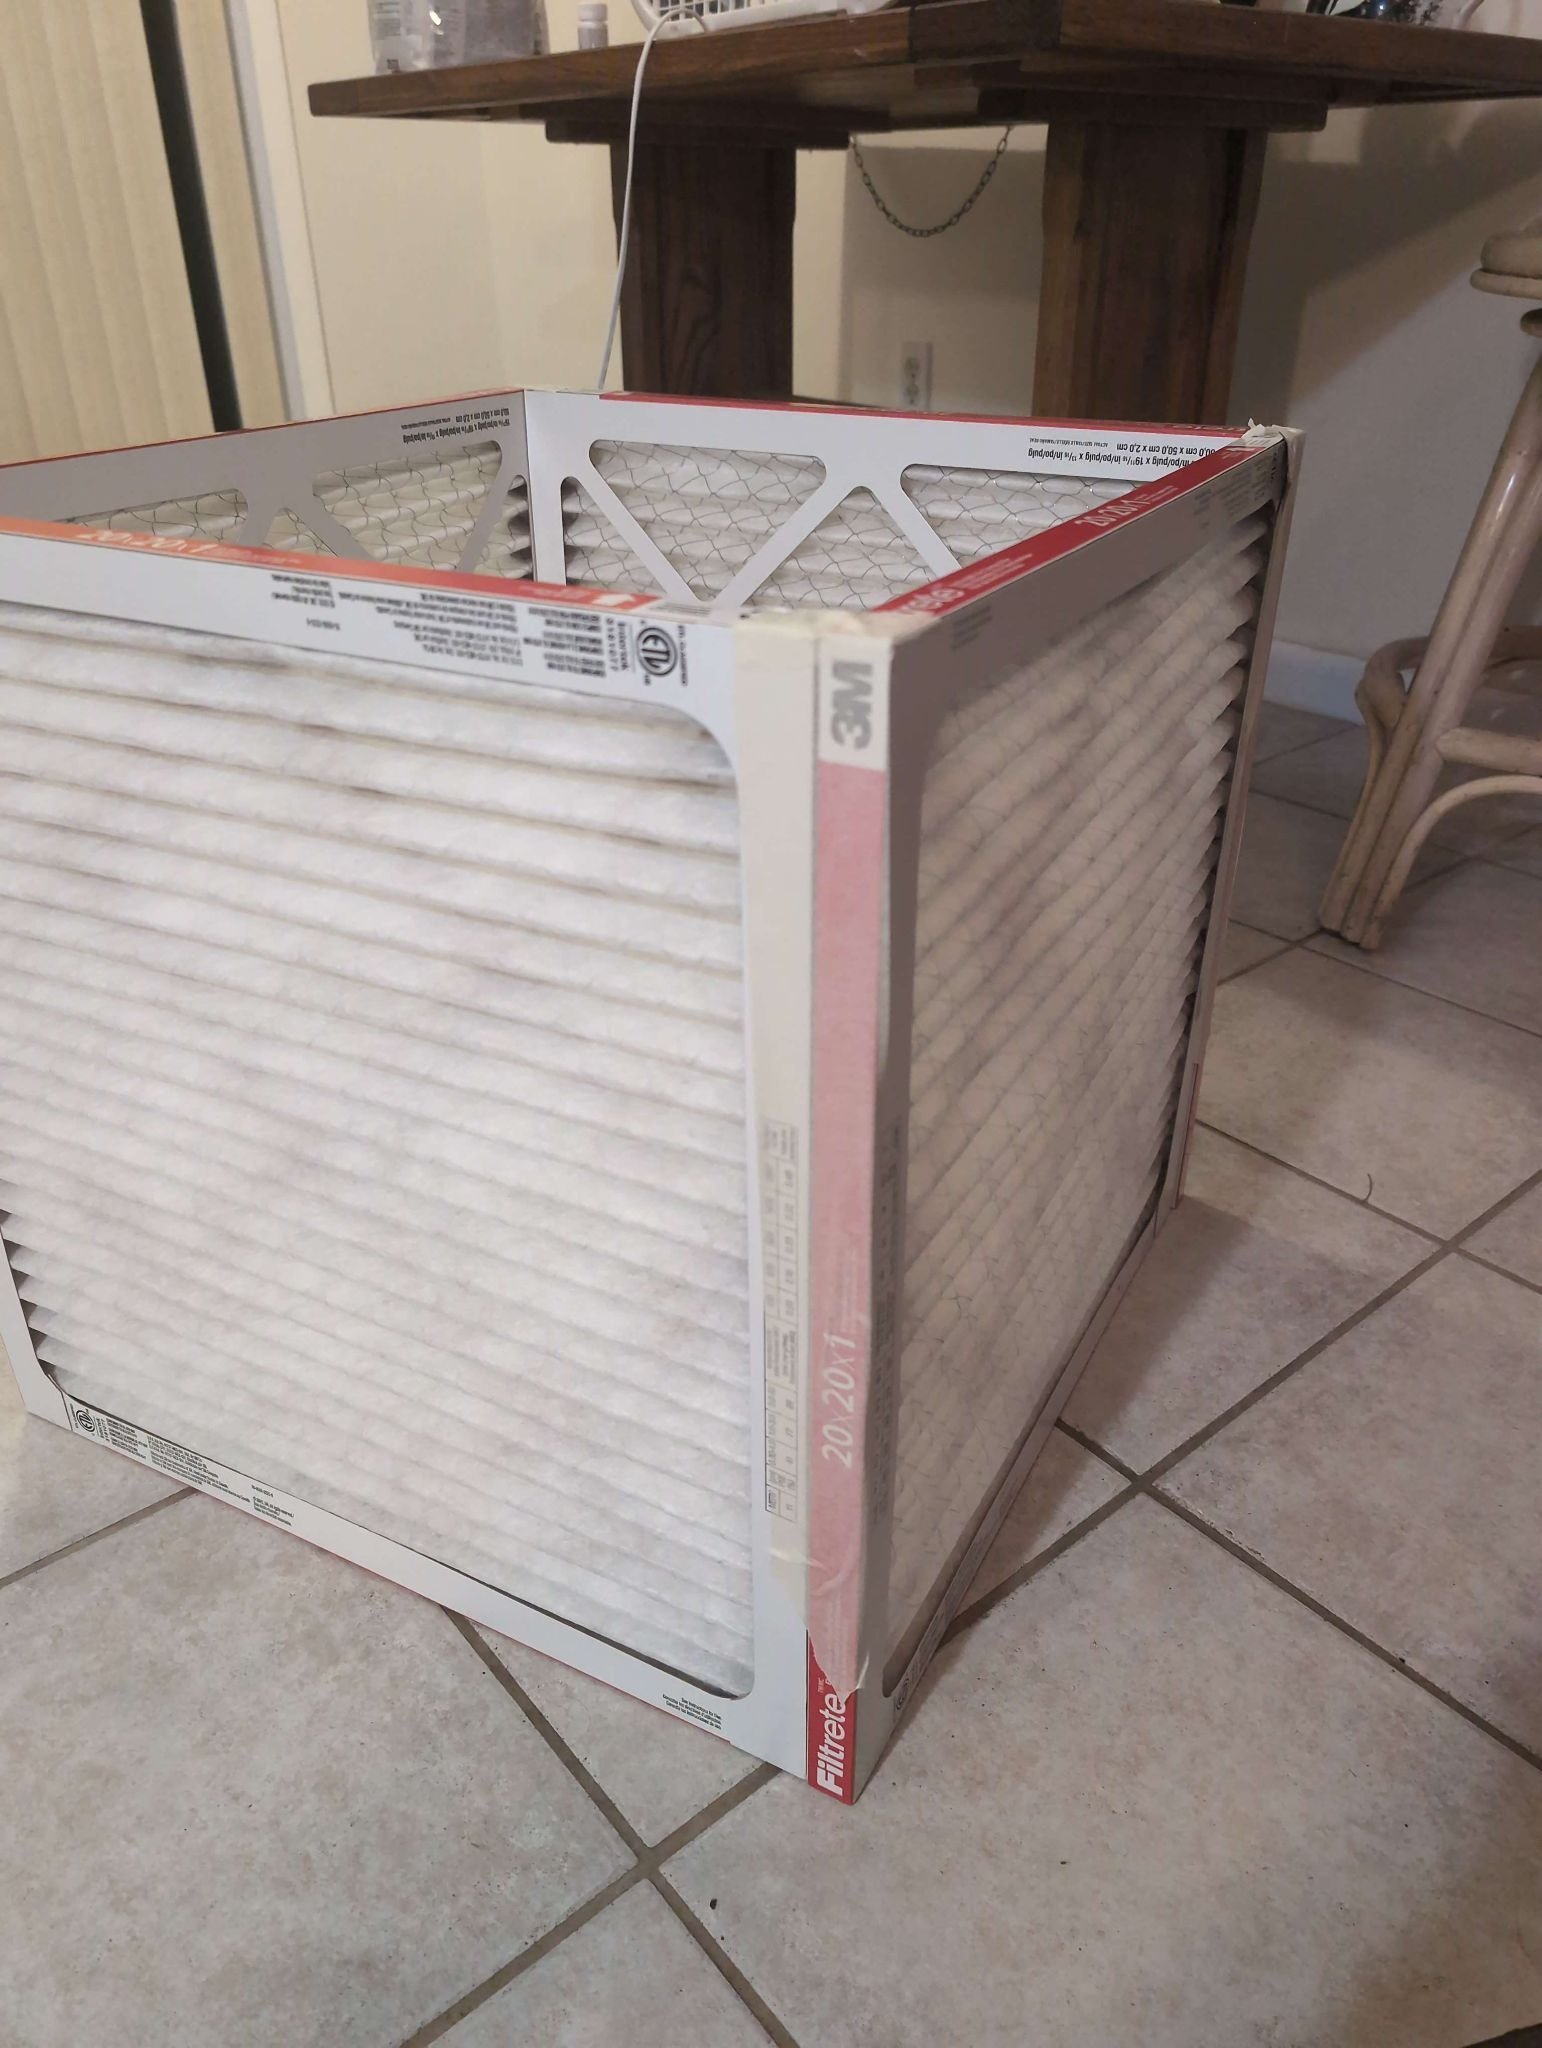
At this point, your square of filters should be feeling more and more structurally sound. You can now flip it over and repeat the simple taping method from Step 2 on the side that was previously on the ground.
Step 5: Cut off a side of the fan box and tape it to the bottom of your filter square
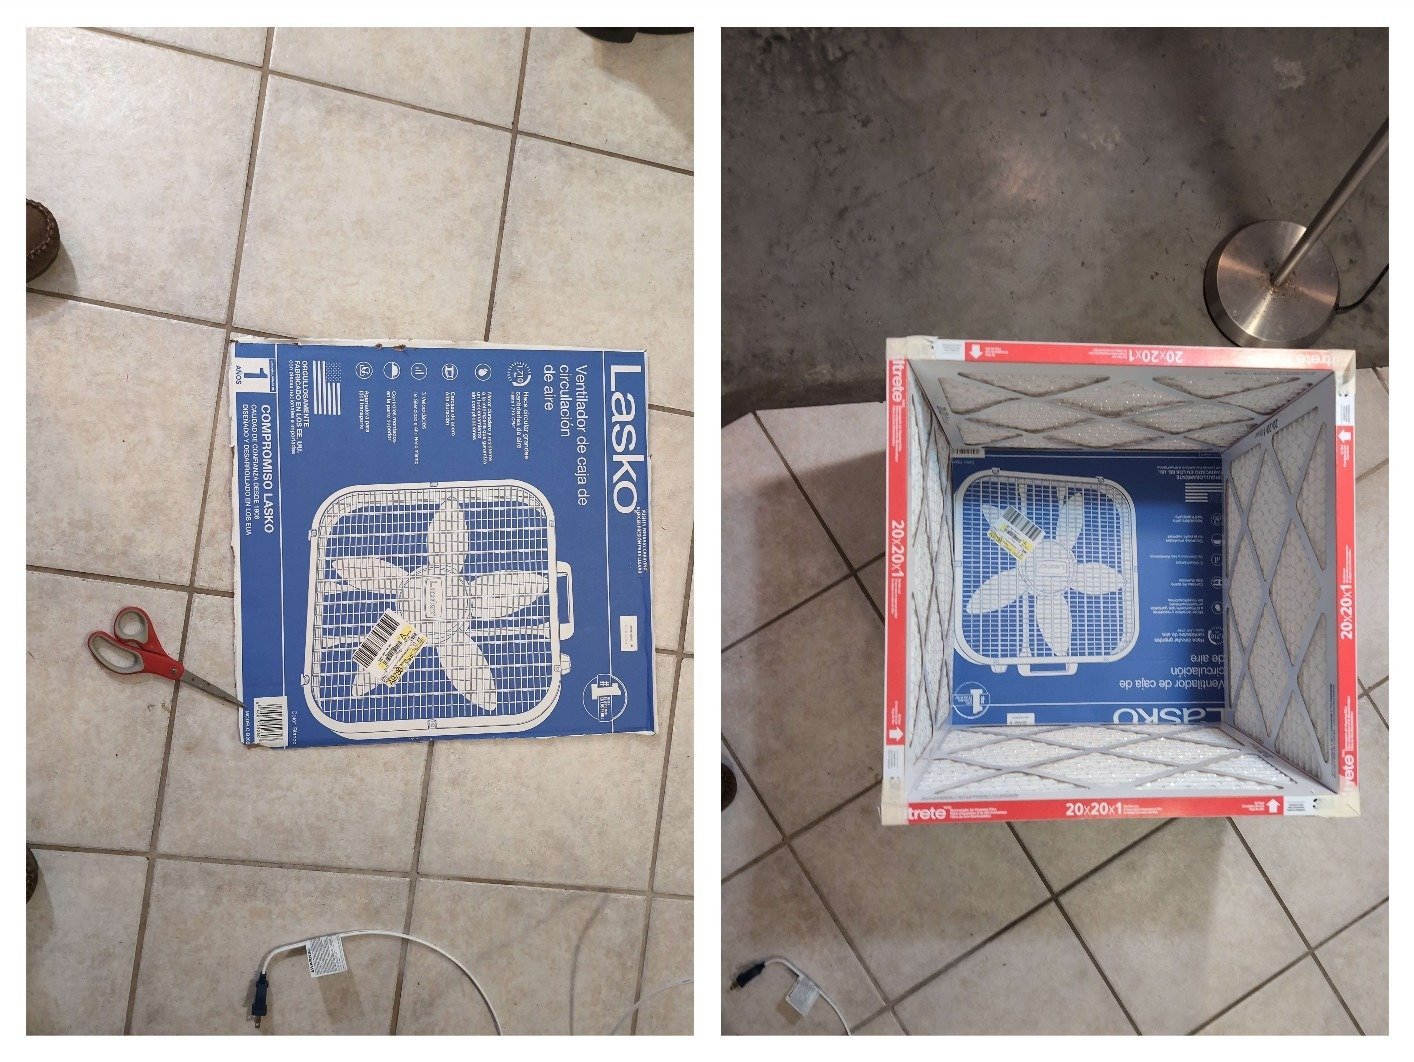
Remember, the box is an important part of the final product. If you place your square over the box, you’ll see they’re roughly the same size. Carefully cut out the most structurally sound side of the box and trim it to be roughly the size of your filter square. It won’t need to be perfect. I used scissors for this, as if imitating a school project, but a standard box cutter or multitool with a cutting edge would be better.
When done, tape the cardboard to one end of your filter square. Your air filter cube now has a bottom.
Step 6: Tape the outward-blowing fan to the top
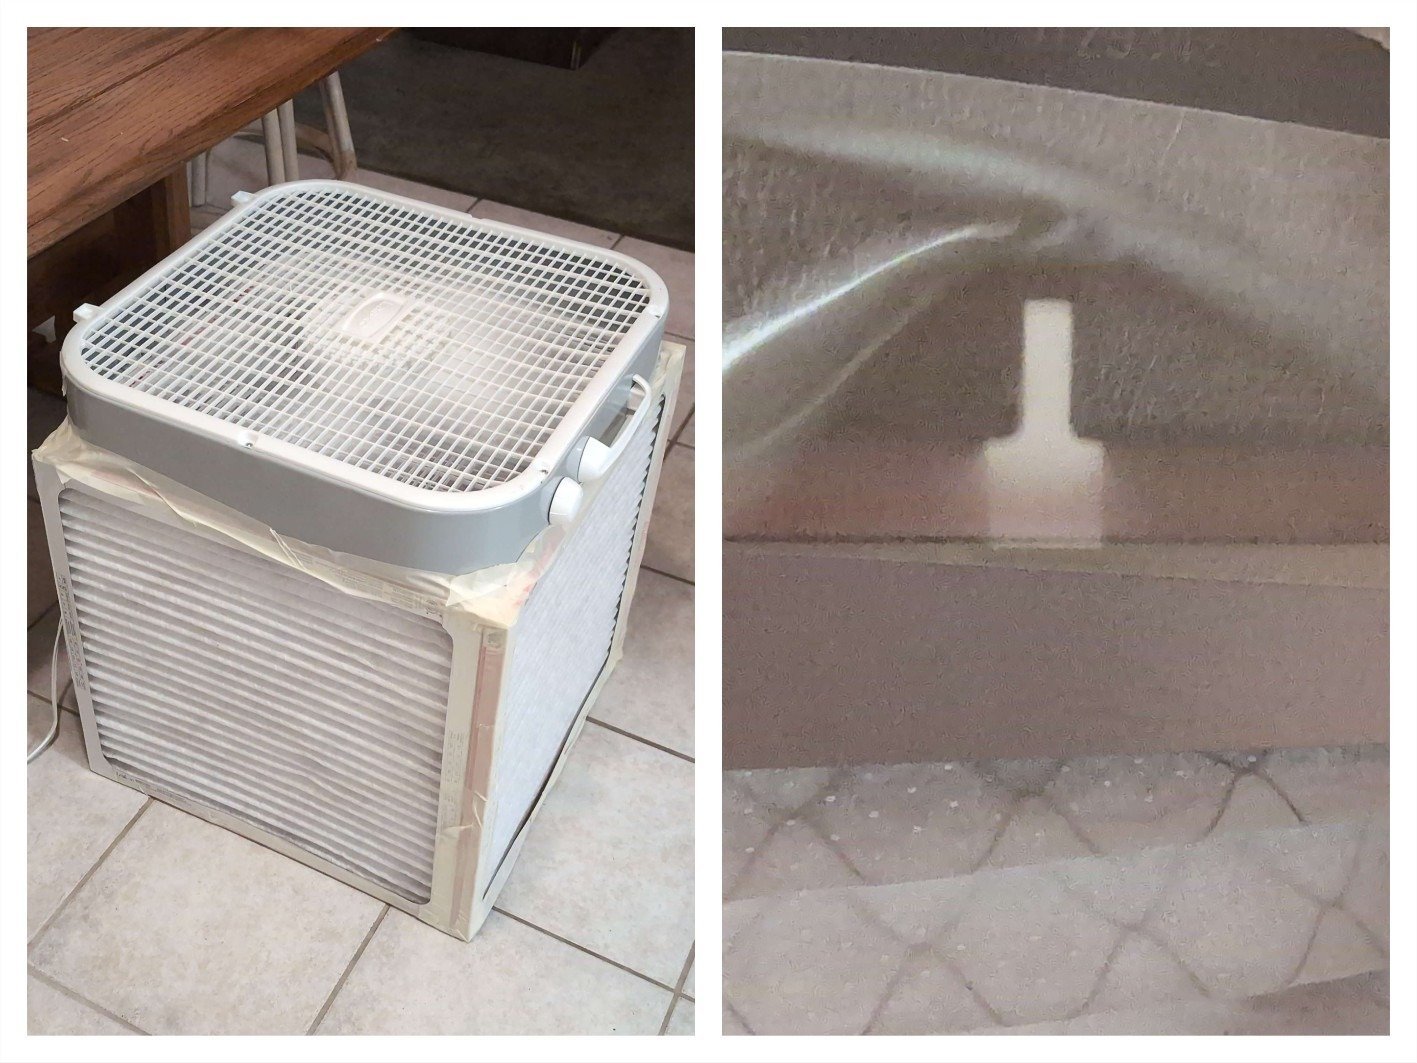
As a last step, take the fan and put it on the top side of the box, taping it down carefully. If your fan has rounded corners, tape those too. If you notice small gaps in the fan housing, you can seal them with tape, provided they aren’t ventilation openings or near electrical components.
Final steps and optional additions
At this point, you have a completed air filter cube. With the fan side up, plug it into an outlet and turn the fan on. Look for structural integrity, a smooth spinning blade with no obstructions from tape or cardboard, and no unusual sounds or vibrations. I recommend being around your new filter cube for a bit before leaving it unattended. Follow any fan manufacturer guidance about long-term or unattended usage.
While I opted not to, you may optionally wish to cover the top of your air filter cube with the cardboard from the other side of the fan box, cutting out a circular hole over the spot where the blades spin. This reduces unintended air recirculation and overall increases the efficiency of the box.
Verdict, results, and final thoughts
Verdict: Making an air filter cube or CR box is a worthwhile experiment that results in a usable final product, but it may not be the best bang for your buck out there.
Results
After having run my air filter cube for several days now, despite not currently being in possession of an air quality monitor, I can still tell it has worked. For example, there is visible dust on the outside of the filters, which accumulated while I was cleaning dusty gear nearby. Furthermore, neither the grill nor the fan blades themselves are showing the dust that typically accumulates on long-running fans. I would call this project, from an engineering perspective, an obvious success.
Practicality concerns: Cost, time, and space efficiency
Functional mechanics aren’t the only issue, though. Money is time and time is money, and both of these are major issues with these boxes.
One of my biggest complaints about how CR boxes are described to the public is that they are “marketed” as cheap when filters are so expensive. Claims of hyper-cheap CR boxes with EPA-like performance are abundant, though EPA sources use MERV13. My use of MERV11, while reasonable, is another reason to call my creation an air filter cube rather than a true CR box.
Low-cost air purifiers are available commercially that even include HEPA filtration. For example, the Dreo Air Purifier for Home is just $44 right now and, according to Google Chrome’s Shopping Insights tool, despite its $100 MSRP, has never been above $56.
The Dreo air purifier highlights a lot of what feels absent from a DIY air filter cube: a small body you can comfortably place in your home, quiet operation, and filter changes that don’t require completely rebuilding the air purifier every time the filters are used up. For average consumers, I suspect something like the Dreo, or even a larger air purifier like the Levoit Core 300, is going to be a much better option in nearly every way.
Is a homemade air purifier the perfect science fair project?
Where this really shines is student science. Building your own air filtration cube is fun, sort of like Minecraft block crafting in real life. Students can explore airflow, cost-effectiveness of different materials, and bring home a usable appliance at the end of a one-hour lesson.
I particularly like the idea of students experimenting with different MERV levels, or comparing the effectiveness of low-cost commercial purifiers to their air filtration cubes. Students can, and should, ask themselves at what point the additional health benefits stop justifying the costs in time and money. These sorts of questions are at the core of environmental and healthcare policies that dictate our real world.

2026 Popular Science Home of the Future Awards
Check back often for more exciting news!